

“I did not expect the most interesting engineering lesson of my holiday to come from a hot tub.”
Like many visitors to 5 Mountains Lodge, I came here to escape the noise and pace of everyday life. Nestled beneath the mountains at the entrance to Bainskloof Pass, the lodge is a peaceful retreat — a place where time slows down, evenings stretch out under the stars, and the simplest experiences become memorable.
It was during one such evening, sitting beside the wood-fired hot tub, that I became unexpectedly fascinated by the fire.
At first glance, the heater appears wonderfully simple: light a fire, add wood, and wait for the water to warm. Yet after spending time with it, I realised there was a surprisingly elegant piece of engineering hidden beneath the surface.
Like many guests, my instinct was to leave the fire open so that it could “breathe”. It turns out this is both less efficient and less safe. Once I understood how the system worked, the tub heated faster, used less wood, produced less smoke, and kept sparks and flames safely contained.
Most importantly, it became clear that proper operation is not intuitive — and that without guidance, most people would never discover the most efficient method.
I was unable to find any good written instructions (not even with Google) so I wrote some of my own… here below… 🙂
Before You Begin: Safety Rules
⚠ Important Safety Rules
- Never light the fire until the tub is filled with water and the stove is fully submerged.
- Never drain the tub while there are hot coals or an active fire in the stove.
- Make sure the drain tap (outlet tap) is closed before starting the fire — turn it 90° to the pipe to seal it.
- Keep water levels high enough to surround at least the base of the chimney at all times.
- Do not touch the chimney, the top of the stove, or the lid — they become extremely hot.
The stove relies on surrounding water to prevent it from overheating. Starting a fire without water — or allowing the water level to drop too low — can permanently buckle and damage the stove, requiring costly repair. When in doubt, leave the water in place until everything has fully cooled.
Operating Instructions
The wood-fired heater has three operating modes. Understanding these before you start makes everything straightforward.
| # | Mode | When to use it |
|---|---|---|
| 1 | Lid off | Lighting the fire only. Replace the lid once the fire is established. |
| 2 | Lid on, vent open 1-inch gap, RIGHT side | Maximum heating. Use this mode for most of the warm-up period. |
| 3 | Lid on, vent closed | Reduces heating and prevents overheating once the tub is hot enough. Always close fully after your soak. |
Fill the Tub
Fill the tub with water – the stove must be completely submerged before you light the fire. Double-check the drain tap (water outlet pipe at the base of the tub) is fully closed — turn it 90° to the pipe to seal it. When it is in-line with the pipe, it is open.
Light the Fire
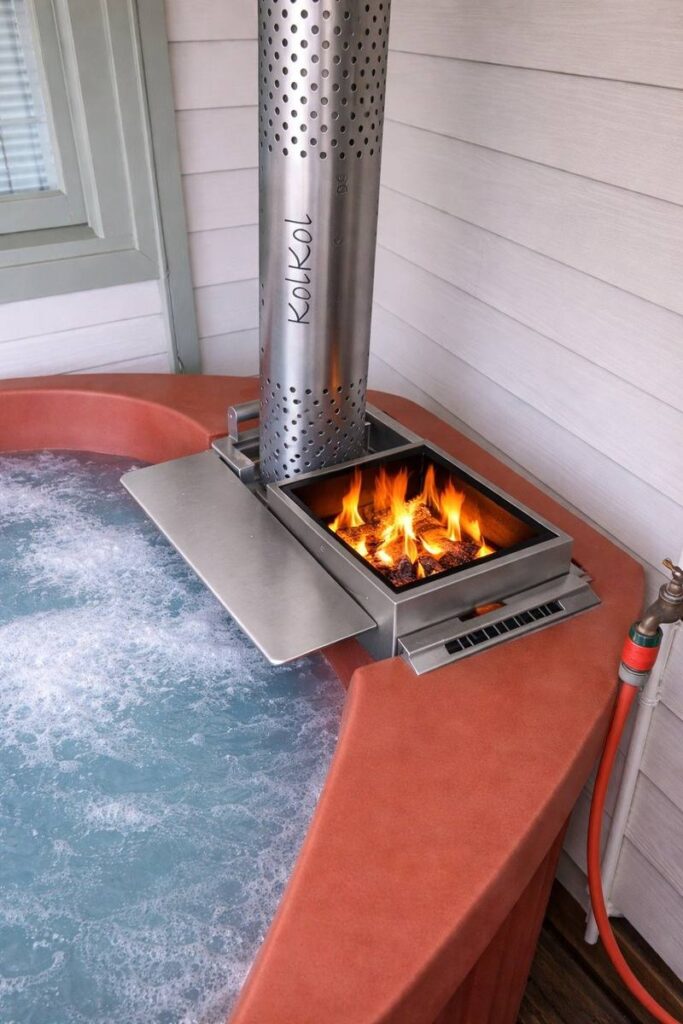
Remove the lid of the fire pit. Place a burning piece of fire starter at the bottom of the stove, directly beneath the lid opening. Stack dry, chopped kindling on top, then add larger pieces of wood over that. Smaller pieces burn more easily at the start of the process.
Fit the Lid (Normal Operating Mode)
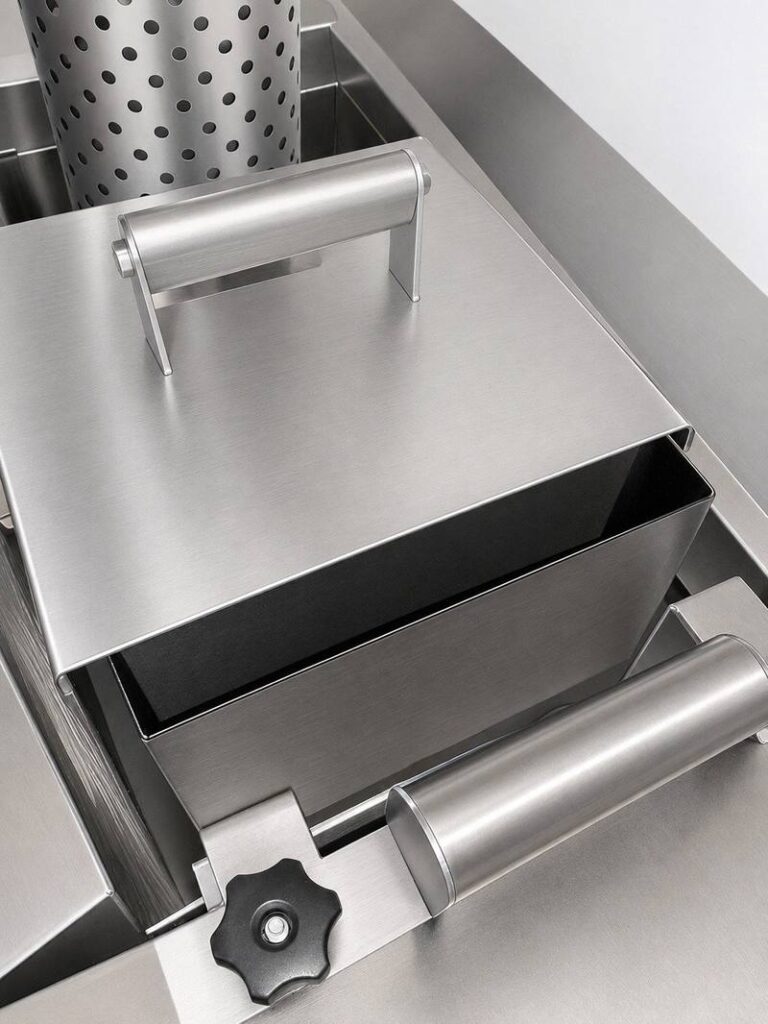
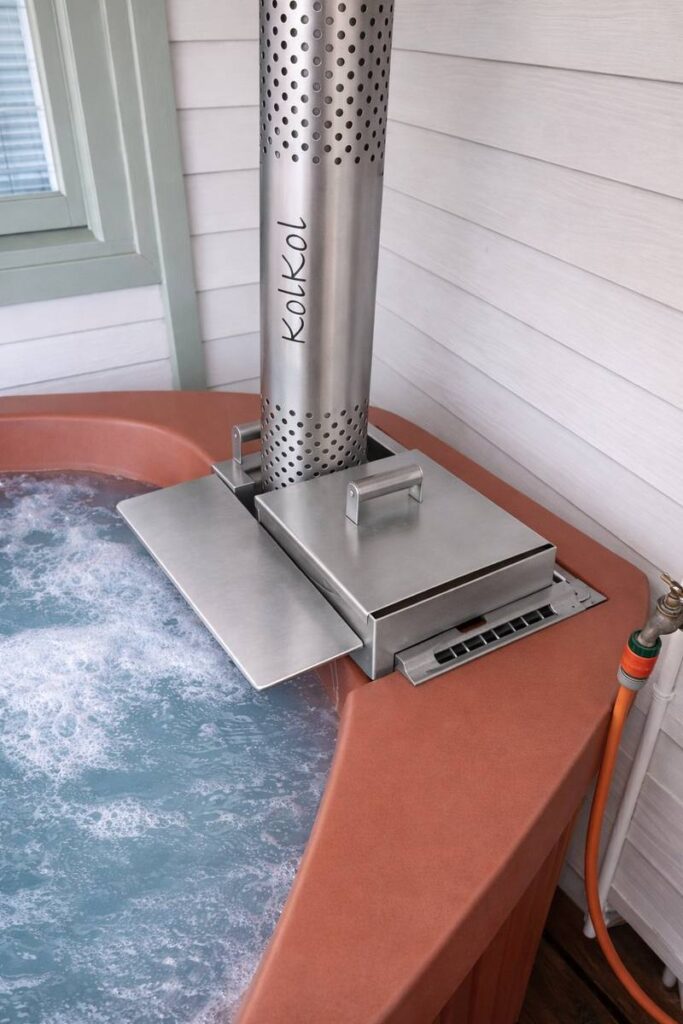
Once the fire is burning well, replace the lid — leaving a gap of approximately 25 mm (1 inch) on the RIGHT-hand side. This is the correct operating position for the fastest, most efficient heating:
- Heats the water fastest
- Uses less wood
- Produces less smoke
- Creates the strongest chimney draft
- Keeps sparks, embers and flames safely contained
💡 Tip
- Float the pool cover on the water surface while heating — it reduces heat loss and can cut heating time significantly.
Add Wood and Stoke
After about 5 minutes the fire should be burning well. Add more dry wood and stoke every 20 minutes. Stirring the tub water after each stoke helps distribute the heat more evenly and speeds up the process.
Expect the water to reach a comfortable temperature in approximately 1 to 1½ hours.
When the Tub is Ready
Remove the pool cover once the water has reached your desired temperature. Close the fire’s air intake fully to choke the fire and stop the temperature from rising further. Fill your glass and enjoy!
⚠ Important
- Close the lid fully once the tub is at warm enough. Leaving the vent open will cause the water temperature to keep rising, and the tub will overheat.
- Your wood coals will last much longer with the closed vent. Re-open the vent if you want more heat.
When you are finished, close the lid fully to choke the fire and contain any remaining embers safely.
Why the Lid Matters
Do not leave the fire burning with the lid removed. Although an open fire may look more impressive, it is significantly less efficient and less safe. Without the lid, the tub can take up to 4 hours to reach temperature — compared to around 1 to 1½ hours with the lid fitted and the vent open. The 1-inch gap on the right is not optional; it is what makes efficient heating possible.
| Lid removed ✗ | Lid on, 1-inch gap right ✓ |
|---|---|
| Much of the heat escapes into the air Tub can take up to 4 hours to heat More wood is consumed Sparks and embers can escape Increased fire risk to surroundings | Heat is directed through the water Tub heats quickly and efficiently Less wood is needed Sparks and flames stay contained Safer for the surroundings |
How the Heater Works
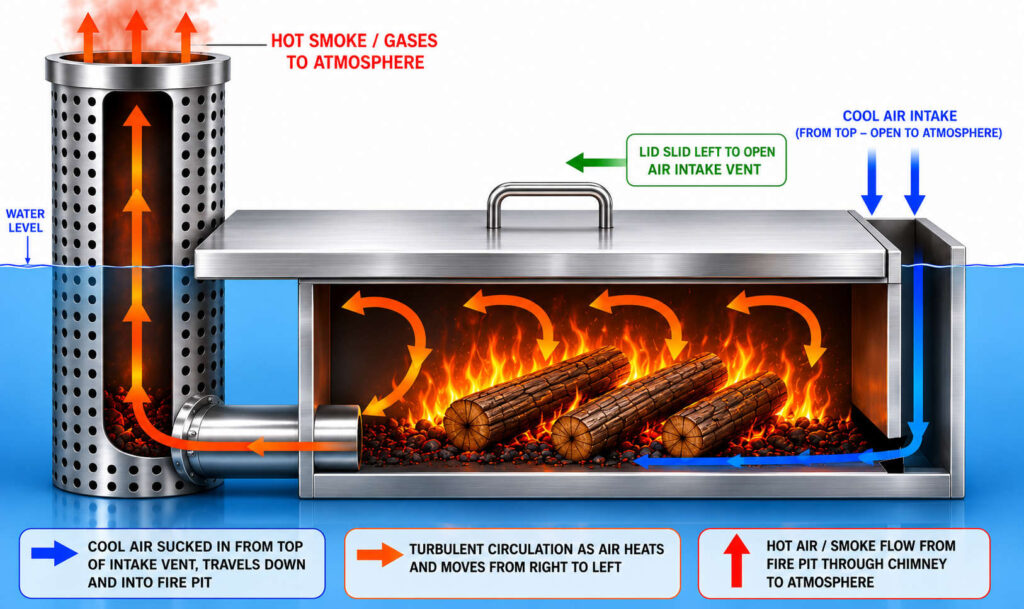
The heater uses a simple but highly effective natural airflow system — no moving parts, no electricity, just wood, air, water, and physics.
As wood burns, hot gases rise through the chimney. This creates a natural draft that draws fresh air in through a narrow channel on the right-hand side of the firebox, delivering oxygen directly to the base of the fire where it is most needed.
The system is self-reinforcing:
- Hot gases rise through the chimney
- Rising gases create suction, drawing in fresh air
- Oxygen feeds the base of the fire
- The fire burns hotter, strengthening the draft further
The lid plays a critical role. With the lid correctly fitted, hot gases are forced to travel through the submerged heating surfaces before escaping via the chimney — transferring heat into the water rather than losing it to the air. Without the lid, the heat simply takes the short route …straight up into the atmosphere.
After Your Wood-Fired Hot Tub Soak
Leave the water in the tub until the coals have completely burned out and cooled down. Do not drain the tub while anything is still hot inside the stove.
💫 Enjoy your soak beneath the stars ⭐
© 2026, anniegoose.com. You are free to reproduce these instructions, but please include this attribution to the AnnieGoose website.

Leave a Reply